
Just imagine, you are soundly sleeping like a baby! Okay, maybe that is a bad example, unless you wake up every 2 hours and cry.
You are sleeping like a moss covered log.
The entire house is quiet and you are having the best dream. Suddenly, the entire house starts trembling like an elephant is doing the electric slide on your roof.
Then you realize… this is an EARTHQUAKE. You hear screaming erupt through the house as the shaking stops and you run to retrieve your family… to get them someplace safe just in case a dreaded AFTER SHOCK turns the house into an unwanted dance party again.
Then you realize… I am in my UNDERWEAR. My children are in their Pajamas. The water is turned off. You don’t have power. How will we see?
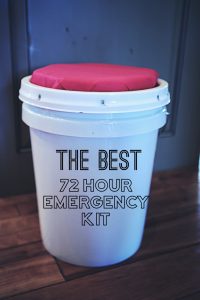
Then suddenly, before the panic sets in, you remember, “Oh yea… I’ve got my trusty, water proof, rodent proof 72 hour kit that doubles as a padded chair ready to go for such an occasion.” Perhaps you think that in a few less words. Still, you’re prepared!!!
72 hour kits aren’t a good idea… they are a GREAT idea! It’s insurance for your family; their needs will be met in case of an emergency.
Perhaps such emergency will never happen to you. I hope is doesn’t. I hope it never happens to us either, but I feel comfort knowing we are prepared!
Now, how do you make these water proof, rodent proof, fully loaded emergency kits/padded seats you ask? I’ll tell you AND I’ll show you!
Let me start by explaining why I decided to make them THIS way.
A few years ago, after feeling like we really need to be prepared in case of an emergency, I bought a few sturdy back packs and packed those things till the little metal tangs of the zipper were just hanging on for dear life. Seriously… I could practically hear them screaming. I then either kept it in my car or in my garage.
Well a few months ago as I went to update our clothing and see if any of the food had spoiled, I noticed holes chewed all over the backpack. Then I noticed that, inside in the deepest, darkest, scariest corners of the pack, were little brown “gifts” left behind mice! GROSS!
It was then that I knew, we needed to change things up.
Then I remembered these buckets that my church made for a church camp. They were secure, water proof, rodent proof, and safety preserved those belongings that we may just rely on one day.
So, here is the BEST 72 HOUR KIT step by step instructions.
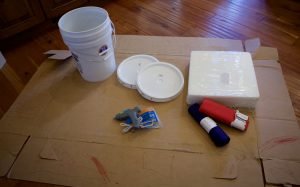
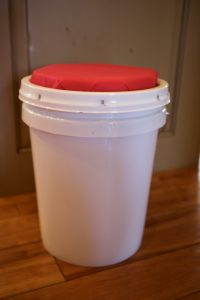
1. Buy a “Food Grade,” bucket and lid. You can buy them on Amazon HERE. You can also find them in home improvement stores and places like Walmart. I bought mine at Walmart for about $6 a bucket. They have different lids to choose from. I chose a sturdy lid, but didn’t go for the twist on/twist off lid and I’ll explain why later.
2. Get a large piece of cardboard, some foam pads (usually found in the craft section of a hobby store or Walmart,) a hot glue gun and some glue, and a yard of material. TIP: I found remnants of material on sell at Walmart in their fabric section. TIP 2: try and find material that is durable and not “fuzzy.” Fuzzy material will be harder to keep clean. I found material that resembles a table cloth. Vinyl would be even better.
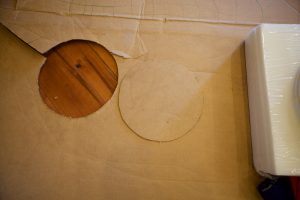
3. Trace the BOTTOM of the bucket onto the cardboard. You’ll notice that the bottom of the bucket easily fits into the top portion of the bucket. This makes for easy stacking. You will want your padded seat to fit into the lid.
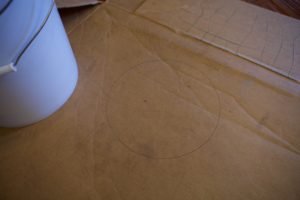
4. Cut the circle of cardboard out and trace it again. If you plan on making more, trace 2 circles for each bucket. It makes it easier… trust me.
5. Take 1 of your 2 circles and place it on one foam pad. Trace the circle onto the foam pad and cut it out.
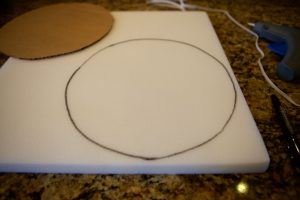
6. Then, take your cardboard and lay it on the fabric. Using the cardboard as a guide, trace a large circle on the fabric. I traced about 4 inches bigger than the cardboard. This will allow space for the foam pad. See picture below.

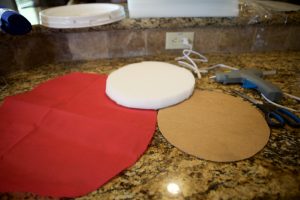
7. Cut out the fabric. Take your 2 cardboard pieces, your foam piece and your material.
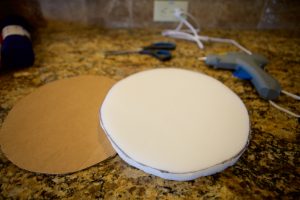
8.Hot Glue your foam to 1 of the pieces of cardboard. Use a generous amount of Hot Glue!
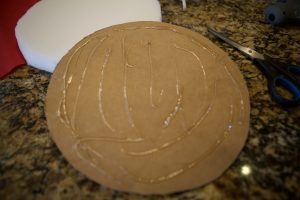
9. Once the glue is set, place your glued pieces in the center of the fabric.
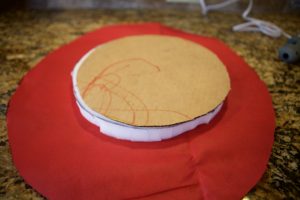
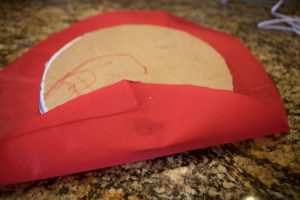
10. Doing one “Side,” at a time, begin gluing the fabric to the cardboard piece. Do this by gluing a “line,” and “folding” the fabric around the cushion. Make sure to keep it tight and try not to burn your fingers.
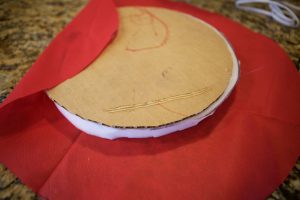
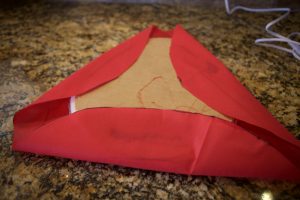
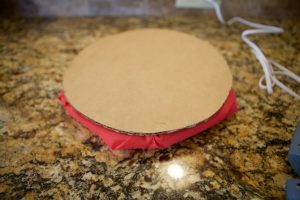
11. Once you have the fabric secured to the cushion, take the second piece of cardboard, squeeze a generous amount of Hot Glue onto it and secure that piece onto the bottom of the gathered edges of fabric. This is to hold the fabric in place and to create a surface that can be glued to the top of your bucket.
12. Using either Hot Glue or Gorilla Glue (I used Gorilla,) glue your cushion to the top of your bucket!
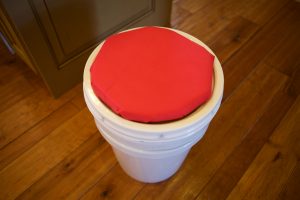
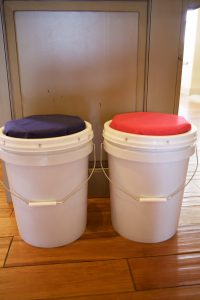
And You’ve Done it! Your bucket, now turned emergency padded chair, is ready to be stuffed like a Thanksgiving turkey!
I still carry a small bag of emergency supplies in my car, but with all of the strollers, car seats, fish crackers, empty capri sun’s, store returns and my own diaper bag, I find I don’t have room for a huge backpack. We keep these secure buckets in our garage.
To get a list of items your should have in your “BEST 72 HOUR KIT,” visit the link below!
Click HERE and I’ll give step by step instructions on how to pack your buckets and what to put in them. I have to say, I was pleasantly surprised with how many supplies they fit.
I hope this helps you as you make like a Boy Scout! Be Prepared Ya’ll. And simply have a sweet day!


[…] pack, water proof, rodent proof, garage safe 72 hour kit. To read those instructions, please click HERE. The kit itself looks something like […]