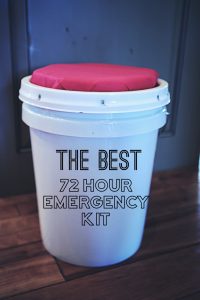
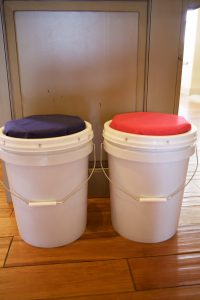
In a previous post, I gave step by step instructions on how to create the best, coolest, easy to pack, water proof, rodent proof, garage safe 72 hour kit. To read those instructions, please click HERE. The kit itself looks something like this.
Even better… it doubles as a padded seat!
Now, the question was… “what do we fill it with?”
Well, I’ve done all the research and work for you. You may come across other suggestions I have not included. Feel free to pack it how you feel is best. The things I’ve decided to pack were simply the items I felt we would need to fulfill our families needs and help them feel more comfortable in case of an emergency.
So, here is a list I’ve gathered of items I feel are needed in a 72 hour kit
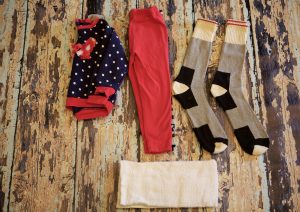
1. Extra Clothing: I packed 2 extra outfits per family member. You can do more or less depending on your needs. I felt that 2 was a good Emergency number for us.
When picking clothes to pack I selected clothing that was large enough to layer in case of cold weather, comfortable clothing, and outfits I knew my kids would fit into for awhile. That way, I can update every couple of years and know that what we have in our kits will work for them for awhile.
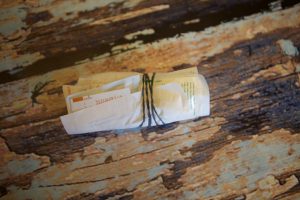
I also bought 2 pair of large winter socks for each family member and rolled an outfit into each pair of socks.
Warm socks can always come in handy. They can double as gloves, provide extra layers as needed, and be tied together to create a rope if needed. They can also be used to carry items and be turned into a “pack” for small kids to carry. Think of all those older Disney short films. When the characters are leaving on a trip or vacation, they don’t pack a backpack. They tie their belongings inside a square piece of material and attach that to a stick, throwing it over their shoulder as they walk (usually whistling,) away! This is the idea.
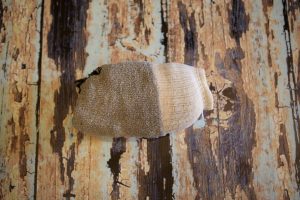
To see how I tucked each outfit, visit the link below. (I did 2 outfits in each pair of socks for my Baby. We all know how it goes with babies. Blowouts, spitting up, and making messes of their previously sparkling well thought out and put together Pinterest inspired outfits.)
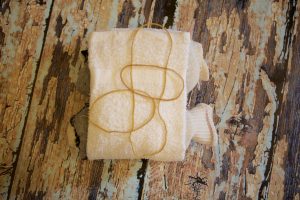
Here is how it looked when I started…
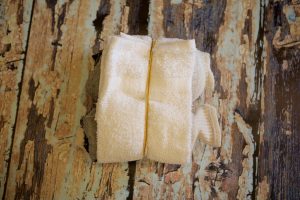
… And when I ended!
You’ll notice the towel at the bottom of the picture. I think it’s ALWAYS a good idea to have a towel or towels in your Emergency Kits. “Don’t forget to bring a towel” – Towely. For those of you who haven’t seen South Park, just know that Towely is a wise wise Character! Always having a towel on hand is GENIUS advice. Genius I tell you!
Anyway, I wrapped both outfits inside of the towel and secured the neat little package with rubber bands. Rubber bands are also a must have in my book. The possibilities are endless.
2. Water and Food:
First and foremost, it is most important to make sure that you family has access to enough water. Painful as it sounds for those of us who love chocolate and peanut butter, you can survive a much longer period of time without food.
You can only survive days or hours without water. We packed 3 water bottles in each bucket, which really isn’t much.
I’ve heard it stated that, to know how much water an average person needs, take your weight and divide it in half. This is how many ounces of water you should be drinking in a day. So, if you weigh 130 lbs, you should be drinking 65 ounces of water a day. If you live an active lifestyle, you should increase this depending on activity.
My 4 year old weighs roughly 35 lbs. That means that, each day she should be getting at least 17.5 ounces of water. Personally, I feel that this is low for an active 4 year old child. However, in case of an emergency, I would do my best to ensure that my children “paced” themselves.
Now, because I’m a bit of a Momma Bear and want to protect my children, I also included a Life Straw. I love these things. They rate really well on Amazon and can filter Gallons and Gallons of water from almost any source. Stream nearby? You’re set. Have a pond? No problem. Lake? This will do the trick.
You can find Life Straws on Amazon by clicking HERE.
Be sure to check out their other products too. They have some really cools stuff.
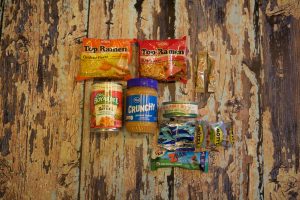
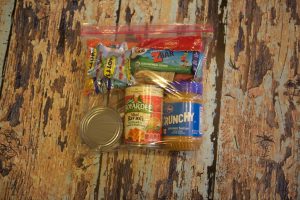
As for Food, I tried to find things high in protein and/or carbs that would not perish for a long time. This included…
- Ravioli
- Ramen Noodles
- Protein Bars
- Peanut Butter (as long as you do NOT have a nut allergy. If so, there are other alternatives,)
- Tuna Fish
- Fruit Snacks
- Later I added some hard candies to suck on to keep those little mouths (Ah, who am I kidding. Big Mouths too,) from getting too dry.
- Another Great Option are High Calorie Survival Tabs Found HERE. We are waiting for ours to come in the mail so we can add them to our kits.
I then packed the food neatly into a double zip Ziplock bag.
3. First Aid Kit
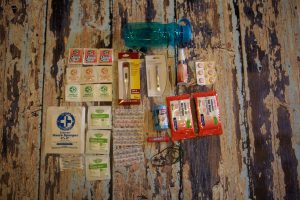
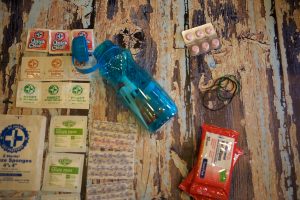
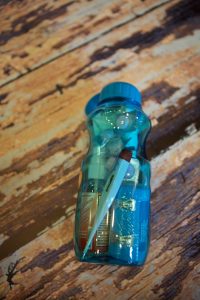
For each first aid kit, I purchased a water bottle from the Dollar store (Something that could come in handy if you do have access to clean water,) and filled it with first aid items. In this I included
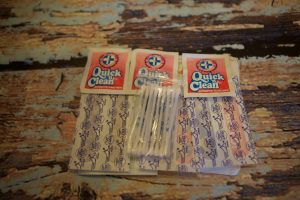
- large and small bandaids
- hand sanitizing wipes
- Children’s Tylenol
- Gauze Pads
- Insect Sting Relief
- Iodine wipes
- A thermometer
- Tweezers
- Hand Sanitizing Spray (My favorite, favorite kind!!! It is one of the other Sanitizers that KILLS the Stomach bug virus. Gel ones don’t work. See below for more info on this.)
- Chapstick
- More rubber bands
- Elastic Tape Wrap
- Cotton Swabs
I placed the larger items in the bottle first (Elastic Tape Wrap and Hand Sanitizer.)
I then piled the gauze pads and creams on top of each other and tightly rolled them together, securing them with the rubber bands.
I placed the roll in the water bottle, and then put the Medicine, Thermometer, Tweezers and other items in the bottle as well. Everything fit just perfectly.
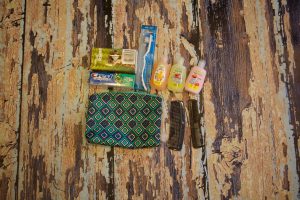
4. Toiletries: I bought a small water proof case from the Dollar store for each person. I then packed it with
- Travel size toothpaste
- A toothbrush
- Baby size wash, lotion, and shampoo
- Combes
- A small pack of tissues
Each of these I bought at the Dollar Store as well. They had a small package of the baby supplies, which included all of the three cleansing and moisturizing agents. Boo Ya for the Dollar Store!
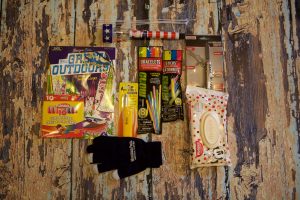
5. Needs and Wants: In these bags, I included
- Glow Sticks (We use these as nightlight for camping. Crack one and they last all night, even when power isn’t available. Genius! My kids also think it’s really fun. Makes power outages a little more enjoyable when we fill their beds and baths with glow sticks,)
- Baby wipes
- Pocket Knife (which we explained was NOT to be used without an adult,)
- Lighter
- Solar power stake light
- Gloves
- Coloring book and crayons. TIP: A crayon can burn light a candle for up to 30 minutes. They key is to get the PAPER around the crayon to light, not the actual crayon. I learned this the hard way.)
- A Face Mask (Not pictured. Added Later.)
- Bleach tablets (Not pictured. Added Later.)
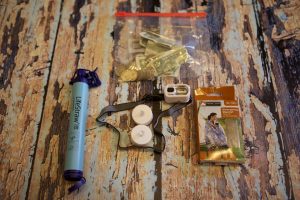
In the other bag we included
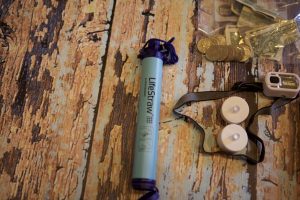
- Dollar Bills and small change
- An emergency blanket
- Battery powered tea lights, and head light (can you tell were are obsessed with lights up in here. The dark is scary at our house. Lol.)
You can also see the Life Straw Pictured here.
Click HERE to find a pack of 10 Emergency blankets on Amazon!
I also think it is a good idea to print off a list of things you may not have access to if the internet or Pinterest is ever down. GASP. Even the very thought… terrifying.
Some of those things I’ve printed off are
- The bleach to water Ratio. If you ever need to sanitize water with Bleach, it’s good to know the ratio. That ratio is:
2 drops to 1 Quart
4 Drops to 1/2 Gallon
8 Drops to 1 Gallon
.5 Teaspoon to 5 Gallons
5.5 Teaspoons to 55 Gallons
- That you can turn your Washer into a cooler if you have access to ice
- If you press a hot spoon to a Mosquito bite, it will destroy the reaction and the itching will stop
- Cotton Balls dipped in Petroleum Jelly make good Fire Starters
- A crayon can burn for up to 30 minutes if you can get it to light. They key is to get the paper around the crayon to light… not the wax. I learned this the hard way.
I hope you find this helpful. Honestly, it took me less than a day to gather the supplies, make the buckets and, with the help of my family, put them together.
I loved doing this as a family. We talked about what we would use each item for as we packed them and came up with Emergency plans. We even came up with a family “Code,” word… a word only we know in case of an emergency. That way, if anyone besides us comes to pick them up from School or a friends house, they know that, if the person can’t tell them the code word, they are not authorized and probably not a safe person. Our kids decided not he code word “Booger.”
Gotcha. Did you believe that? Really? did you really think I’d post our code word out there for the world to see. Of course not! Our word is a secret, and yours should be too!
Happy Preparations everyone and I simply wish you a sweet life!





[…] HERE, I give step by step instructions on how to pack your buckets and what to put in them. I have to […]