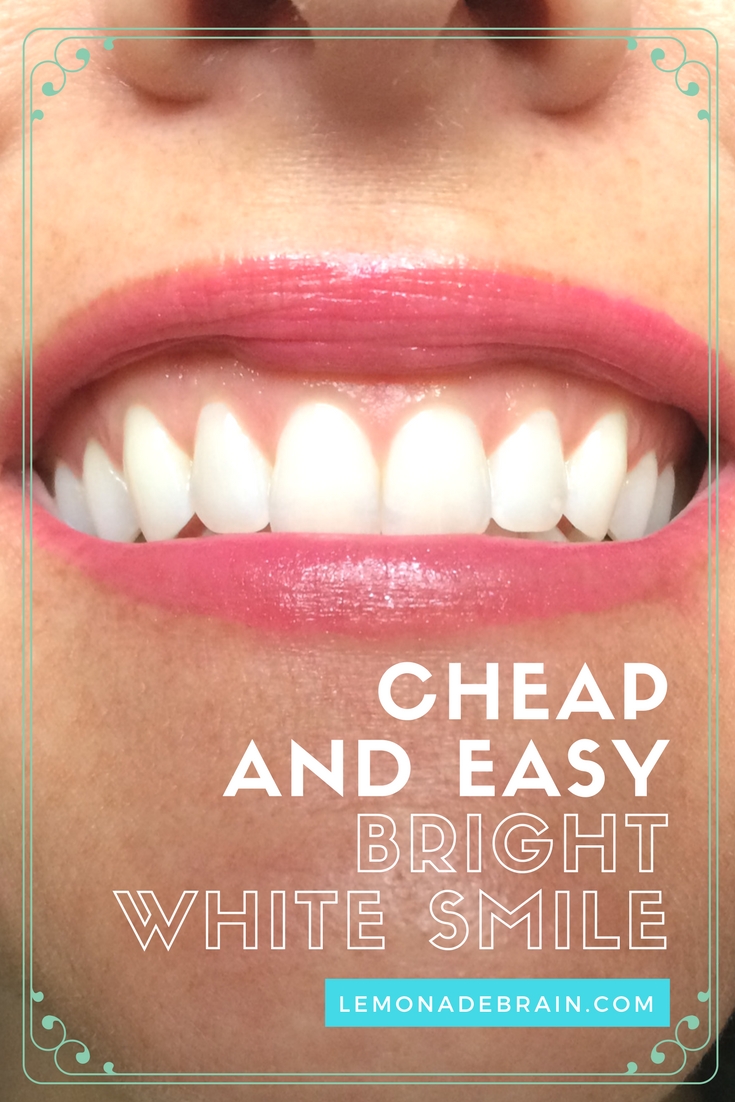
Do you want that cheap way to a Hollywood White Smile? So did I!
Let’s face it, most professional teeth whitening gels cost an arm, a leg, and possibly a few gold fillings. Not to mention those custom bleaching trays that can deplete your wallet.
For these reasons I went on a mission to find the best, fastest, and cheapest ways to achieve that gleaming white smile we often see appearing in Hollywood’s most popular smiles.
And I’m here to tell you that I’VE DONE IT! Are you ready for my secret recipe?

First, You will need trays. Now, I’m not suggesting you do empty that pocket book… perhaps just dig through your couch cushions for some loose change.
In almost every major “One stop shopping,” type store like Wal-Mart or Target and the like, you can find these rubber mouth guards commonly used in sports. Here’s an example.
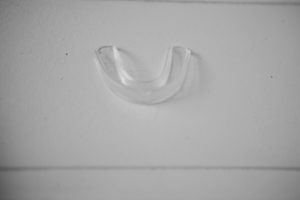
The best news is that these little guards are usually around One Dollar apiece. You read me right… $1.00. They can also be fit to your specific smile. Here are the steps.
Step 1: Buy 2 mouth guards/trays; one for your top teeth and one for the bottom. They look like these.
You can follow the instructions on the package to form the guard to your teeth, (This usually involves boiling it in water and quickly placing it over your teeth, then sucking as hard as a Hoover till the guard is air tight.)
However, I chose not to do this. I find it works just as well and skipped the step, thereby avoiding possible burnt fingertips and a singed roof of my mouth. However, if you’d like to fit it to your mouth, then it is very easy.
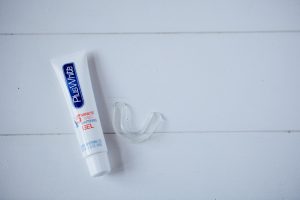
Step 2: Buy a whitening gel similar to this or this.

You can also purchase these at almost any convenient or super store. I’ve seen them at Wal-Mart and Target.
Or, if you’d like to order it from the comfort of your own home and not go on a hunt through the store, you can purchase it HERE
Step 3: Apply to gel to the front part of each tray. Place the tray in slowly and try to “Push” the gel toward the front of the tray. After all, the only person that may see the backside of your teeth is your dentist. If any gel seeps over the guard and onto your gums, wipe it gently away with a tissue or paper towel.
Step 4: Wait for at least 5 minutes. I like to leave them in for 10-15 minutes or more. I’ve heard the gel can make your teeth a bit sensitive, but the only time I’ve experienced this is when I’ve used over night whitening gel and that was 15 or so years ago.
Step 5: After your allotted time, remove the trays, rinse any remaining gel from them, and rinse your mouth.
Note to reader: If you decide to do step 7, skip step 6. If you decide not to, then you’re done and you can skip ahead to step 8. Wow, I feel like I’m writing one of those “Make your own story,” books right now. Do you feel that way? Lol.
Step 6: Brush teeth, or continue to step 7. I like to brush with toothpaste just after. My favorite toothpaste is HERE.
It’s got Coconut oil, helps with sensitive teeth (who has sensitive teeth? this girl!) and it has a light, sweet mint flavor. I love it.
Step 7: Iike to add this step. I feel it boosts that “Hollywood White,” process into ludicruous speed, but then, this is just my experiece.
If you have coconut oil, take a tablespoon full, put it in your mouth, let it melt and swish it around for 10-15 minutes. This is called oil pulling. Not only does it remove impurities from your teeth and mouth, but it can also help strengthen your tooth enamel and it helps to remove harmful bacteria, the kind that can cause tooth decay, from your teeth. Because it removes impurities, it also removes yellow stains. My goal is to oil pull with coconut oil every day, but I usually get to it 3 – 4 times a week.
Oil pulling has many other benefits as well. Some even claim that it helps improve health and energy.
For me, I’ve found that it has helped keep cavities at bay. Side note: I’d only had one minor cavity before I had my son. While pregnant with my son and my first daughter, I swear my teeth rotted out of my mouth. The combination of Mommy sickness (horrible) and being depleted of nutrients from said horrible sickness (Mommies… I’ve been there. I feel your pain) my teeth felt the full brunt of cavities moving in to take over the block.
However, when I was pregnant with my 2nd daughter, I oiled pulled at least 3 times a week. When the dreaded post natal dentist appointment came around, you can bet my teeth were chattering. To my pleasant surprise, I had NO cavities. In fact, the dentists said that my enamel looked stronger and healthier that ever. Oh Yea! You can bet I’m sold on coconut oil! But I digress…. Onto step 8.
Step 8: Repeat 3 days. If you find your teeth are sensitive, wait until they are no longer so and then repeat.
I hope you find as much success gaining that gleaming smile as I have. Plus, you can bet my wallet and bank account are happy as well!
Happy whitening everyone! Now, go and simply make those teeth gleam! Here’s to a sweet (and cheap) smile to… uh, smile about!